Option Logic & Option Mapping
Option Logic and Option Mapping.
Setting option behavior is one of the most important parts of the configurator. To properly visualize what the two terms mean, we can we define these terms as follows:
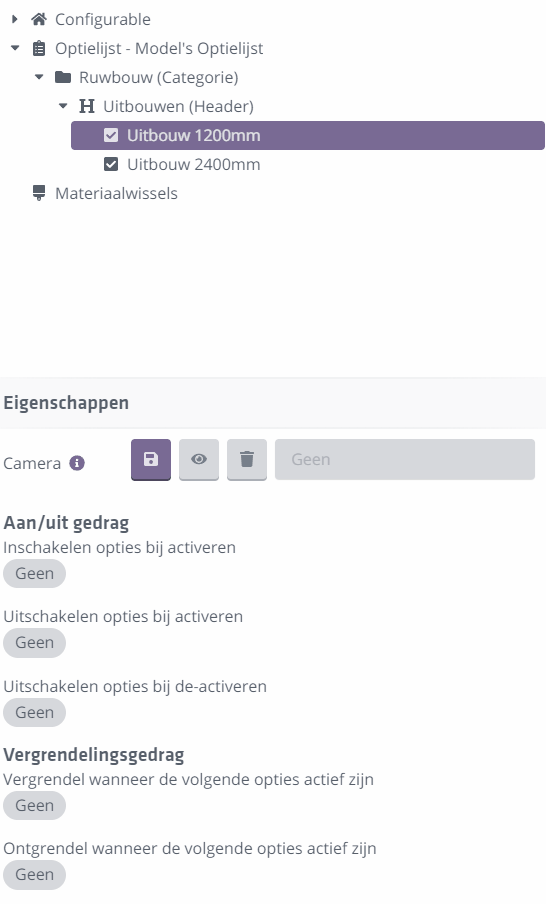
- Option logic: setting the "behavior" or "dependencies" of an option through (boolean) logic. An option can activate, deactivate, (self) lock or unlock.
- Option mapping: the process of assigning options from an option list to
Model Groupswithin a bag field.
Option behavior.
How options interact with each other depends on 2 factors:
- The
Option Typeused. - Set
behavior fields.
Option type behavior.
Although 4 available option types can be used, from the point of view of option logic there are only
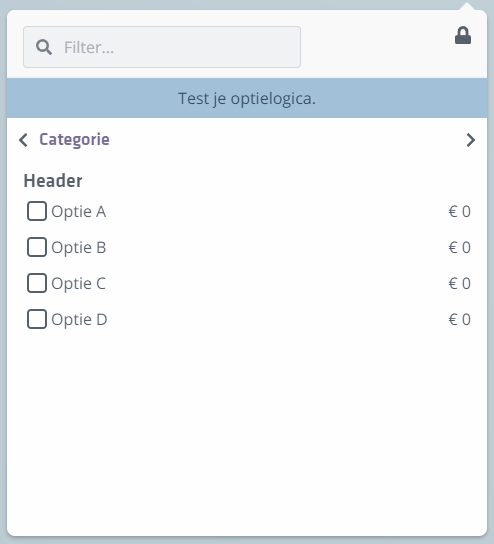
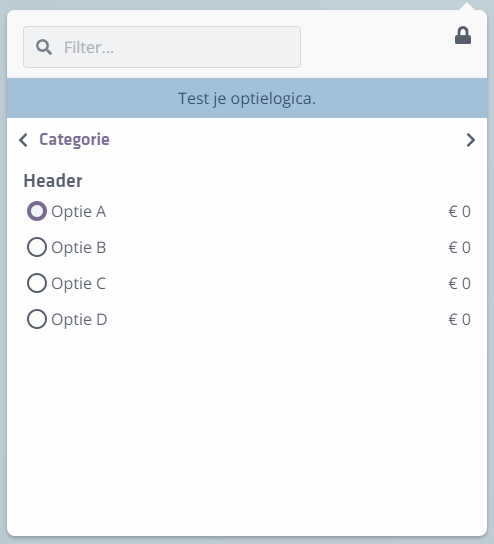
2 types to be distinguished. These are the Checkbox and the Radio button. The other 2 types: Thumbnail and Color behave like Radio buttons.
-
Checkboxes can be turned
ONandOFF, completely independent of other options in the option list (unless behavior fields) are applied. -
Radio buttons can be set
ONand neverOFF. Radio buttons under one and the same header turn every other off. There can only be a maximum of 1 radio button under a header on at the same time.
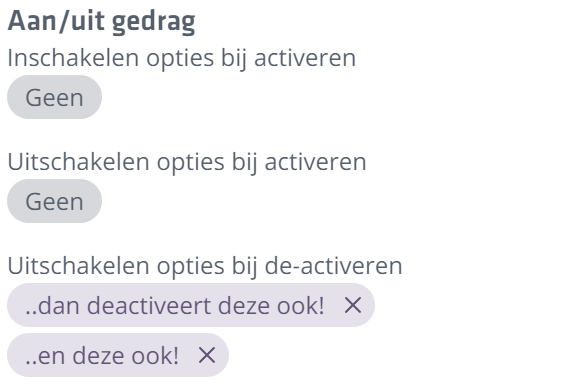
Behavior fields
Setting the option logic, in addition to the inherent behavior of options (especially radio buttons) determines the mutual behavior of options. The possible behavior fields that can be applied to an option are found below and are as follows:
Enable options on activation
— When this option is checked ON, the option(s) in this logic field are also enabled.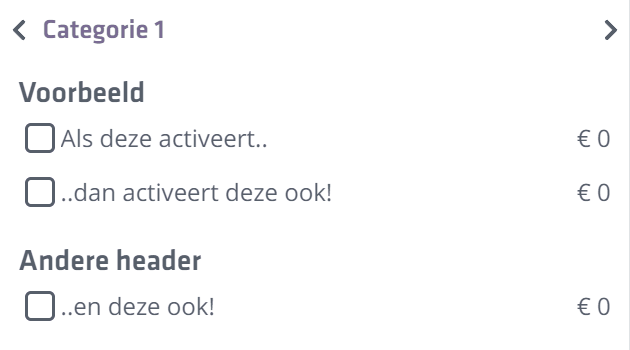
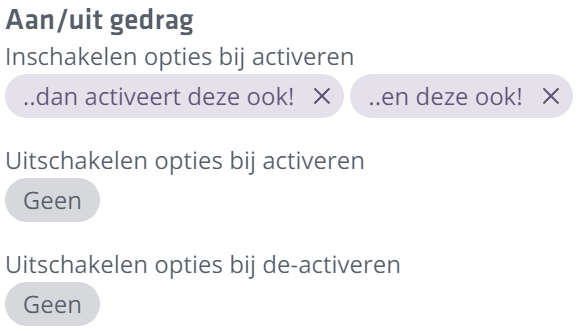
Disable options on activation
— When this option is checked ON, the option(s) in this logic field are disabled.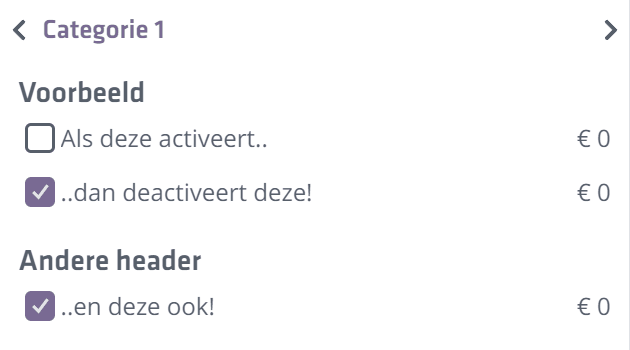
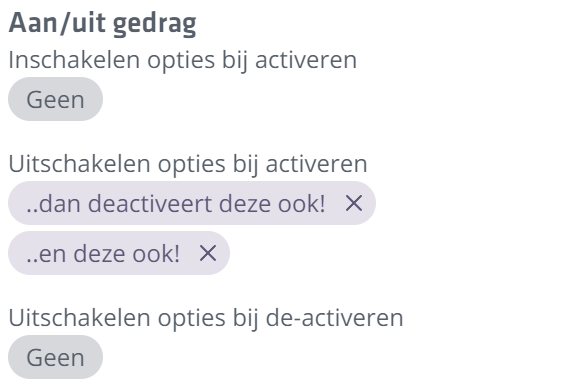
Disable options when deactivated
— When this option is turned OFF, the option(s) in this logic field are also turned OFF.
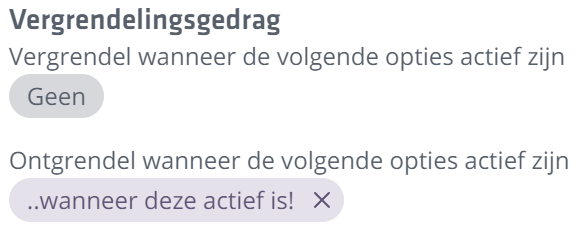
Lock when the following options are active
— Locks THIS option in the option list when the option(s) in this logic field are enabled.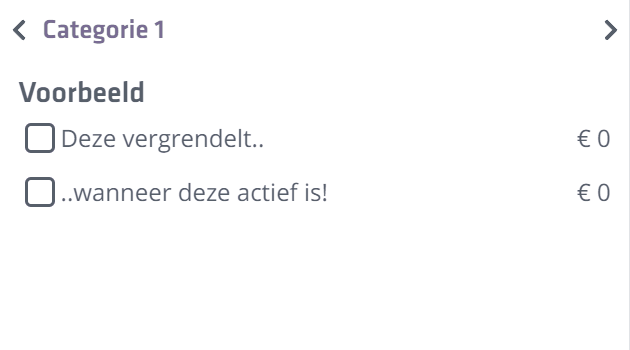
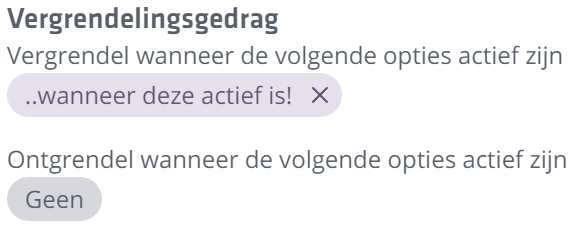
Unlock when the following options are active
— Unlocks THIS option in the option list when the option(s) in this logic field are enabled.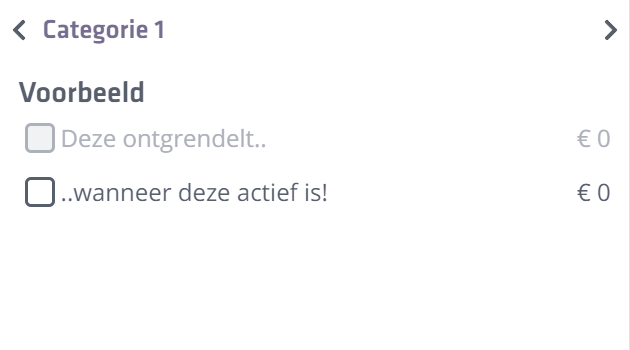
Setting up
To set option behavior for the currently selected option, you can drag another other option from the option list into the behavior field of the currently selected option. If you want to remove an option from a behavior field, you can do so by clicking on the cross present on the 'pill'.
So for example, if you have selected the option 'Extension 1200mm', you can by (clicking and) dragging the option
'Extension 2400mm' in the Disable options on activation behavior field to ensure that 'Extension 1200mm' is `disabled'
at the time you enable 'Extension 2400mm'.
Make sure that you also set this the other way around for the 'Extension 2400mm'. Otherwise you create a one-way dependency. With a checkbox-type option you will usually have to set this logic more often.
For example, if you use the radio button you don't need to set logic but will have to create an additional 'option' in the option list to accommodate for 'No Extension'. (After all, you can't disable a radio button, only exchange it with another radio button within the same category or header). Ultimately, it is up to you to make the choice of what works best for your model and/or option list.
Option mapping
To properly begin the Option Mapping process, it is highly recommended to have an option list ready. The option mapping process means
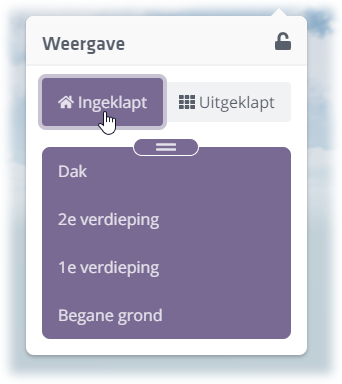
mean that you link options from the option list to the Model Groups in the bag field. To do that, in the Configurable-Editor you will have to "unfold" your
bag field expanded.
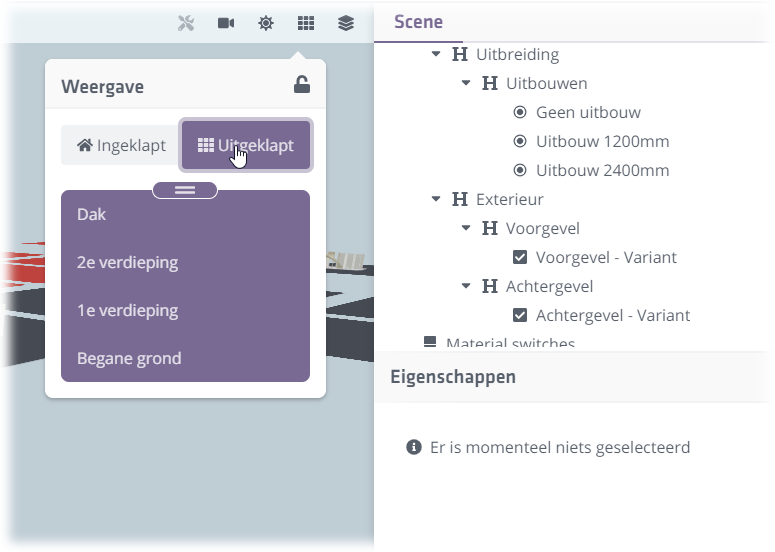
If your bag field design from Revit has already been imported (correctly) into Innobrix you will see that it differentiates between certain cells. A completely new model will look something like this (unfolded and viewed from above).
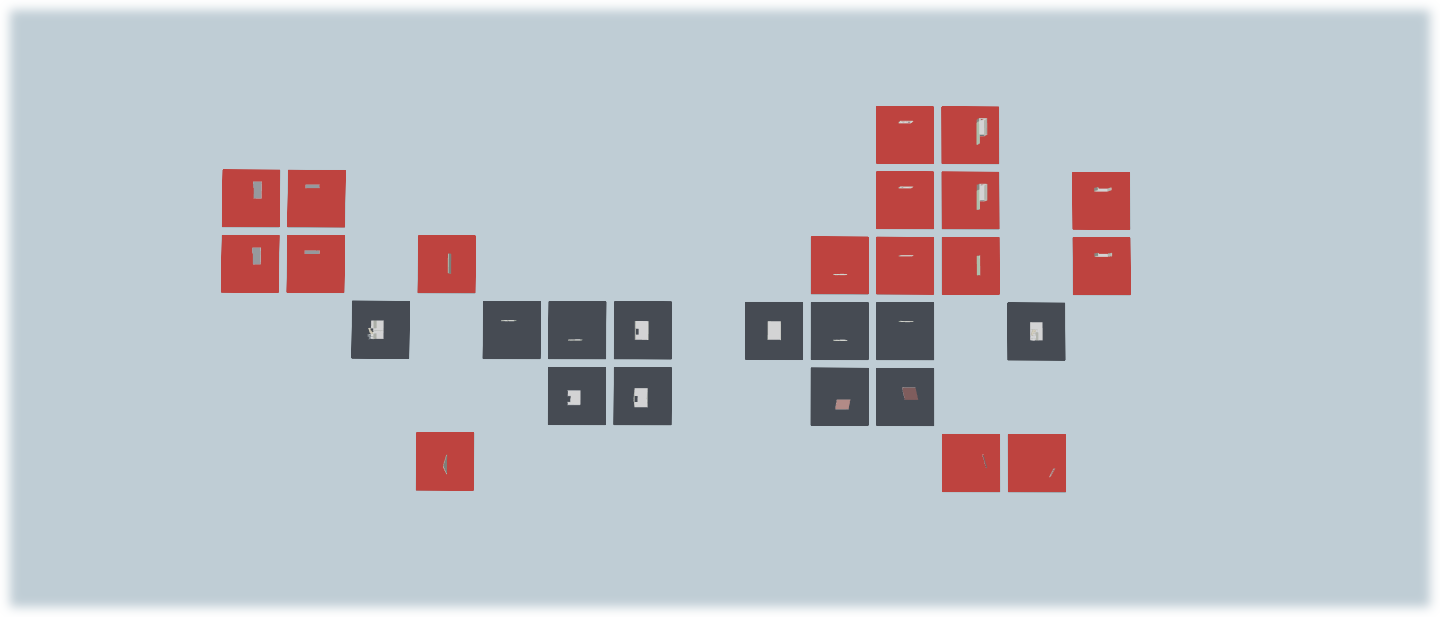
The red groups indicate that there is no option associated with this cell or that the logic related to these cells is incorrect. Exactly how that works, we'll get to that in a moment. The blue groups indicate that this is your "basic" groups ("Default"). In practice, this means that these (blue) groups are always on unless an option has been called that causes the current blue group is exchanged with another group within the same column.
CAUTION: it is a hard rule of thumb that only 1 cell per column can be on at all times!.
When you link an option to a cell, the base cell is exchanged with the cell to which you link that option. To link an option to a cell, click and drag the option you want to link from the option list to the appropriate cell in your scene. It is also possible to click a cell and then drag and drop the option from the option list and place it under the "Linked Options" heading.
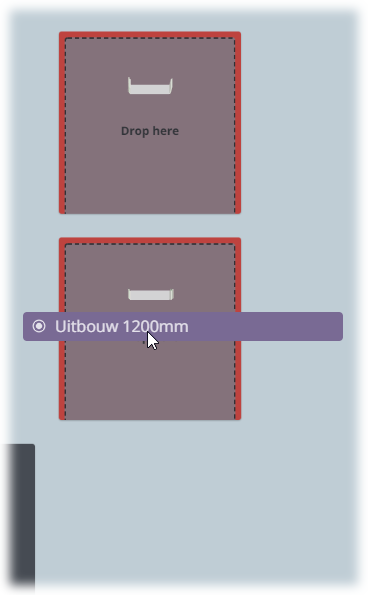
Once the option is linked to the cell, the cell will no longer be colored red and will also (visually) show the option within the cell. Once an option is attached to the cell, that particular cell will be turned on as soon as that option is chosen in the option list.
It is common that options can be combined. Think for example of a sliding door version in the rear facade where an extension can also possibly be chosen. To provide for this it is possible to place multiple options in one cell. So think Expansion 1200mm + (AND) Rear facade - Variant.
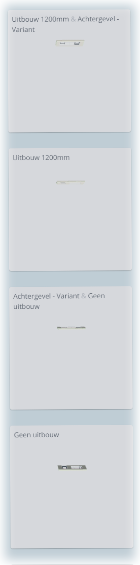
We are dealing with 4 cells here, from bottom to top:
1. No expansion
2. No extension AND (&) Rear facade - Variant
3. Extension 1200mm
4. Extension 1200mm AND (&) Rear facade - Variant
Because we have chosen the Radio-button way to invoke the Extensions, it is necessary to change the blue (default)
cell initially into an option cell. You do this by clicking on a blue cell and then unchecking the
Uncheck Default. Of course, this principle also works the other way around: you can also turn an option cell into a standard cell
by unchecking the checkbox. So we had to link 'No Expansion' to this 'basic' cell.
Besides the ability to set AND conditions for cells, it is also possible to apply OR conditions to the same. OR conditions are used particularly when there are cells that can be used in multiple option combinations and are not always be reserved for only 1 condition. These OR conditions are displayed as options in a cell below each other, separated with an -OF- line. AND conditions are options that are placed side by side in a cell and are indicated by the symbol &.
It is important to keep in mind that no 2 groups can turn on at the same time in a single column. This means that the conditions of 2 or more groups should never be met in a single column.
Option behavior and logic testing
When you think you are done with the option mapping process and want to start testing the behavior to see if everything works correctly functioning you can do this by first returning your model to its collapsed state.
When the model is returned to collapsed form, at that point only the blue (default) cells will will be shown. When you want to start testing if everything works you can start configuring, just like an end user, by turning Turning options on and off. Using the tool icon you can open options list in the 'user' variant and start testing from this list.
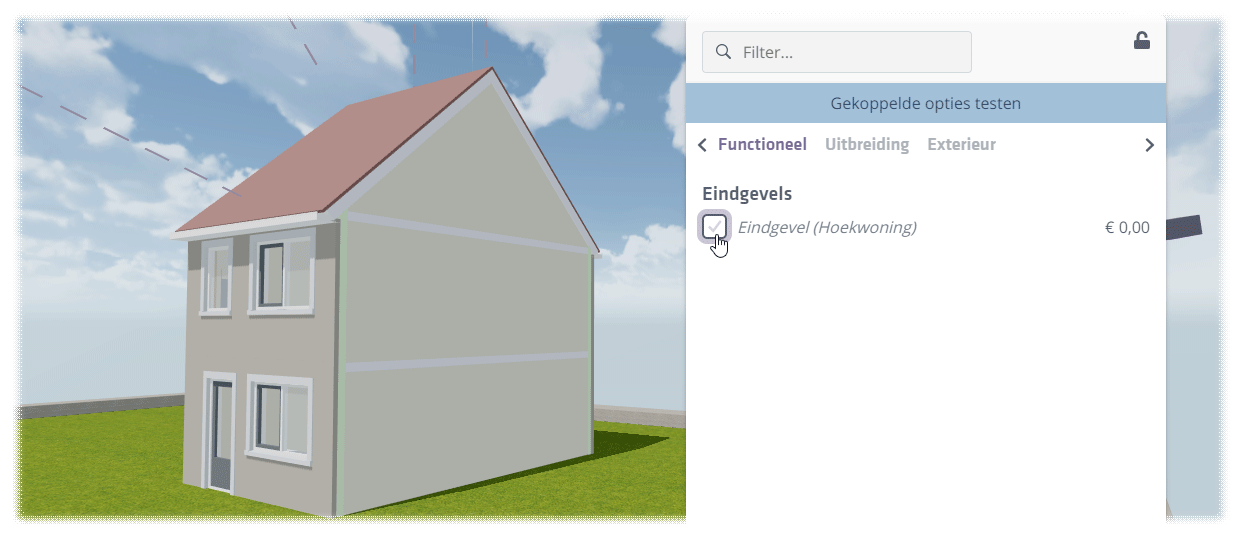
If certain things don't seem to be right, you can go back to the unfolded variant of the bag field to check see where the problem might be. 99% of the times it has to do with a logic error.